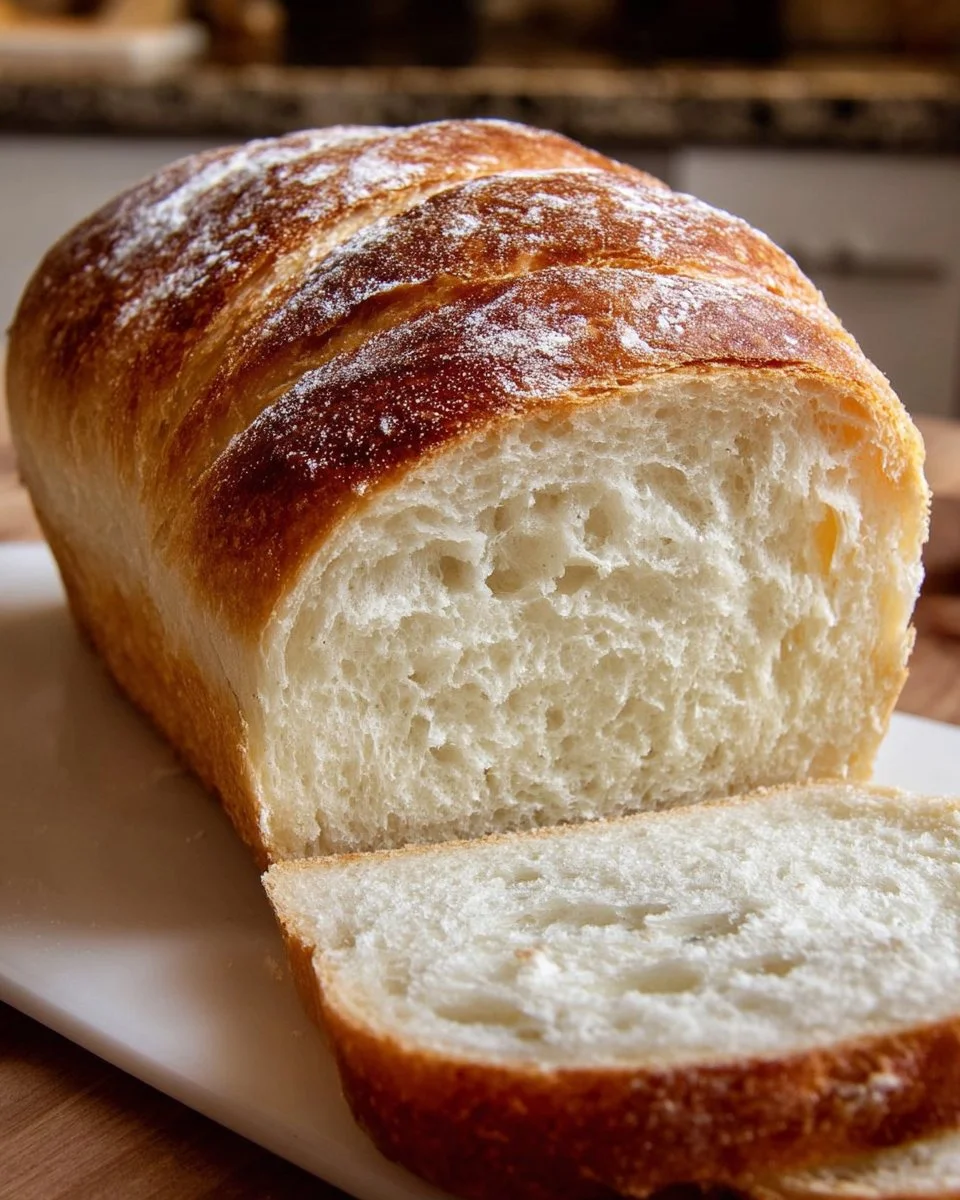
Baking your own bread is a magical experience that fills your kitchen with warmth and an irresistible aroma. Imagine this: you’re standing in your kitchen, a gentle breeze wafts through the window, and the unmistakable scent of freshly baked bread wraps around you like a cozy blanket. You gaze expectantly at the oven, and each minute seems to stretch as the golden loaf transforms, rising and bubbling with anticipation. As you slice into it, a crunchy crust yields to a soft, pillowy interior. Each bite melts in your mouth, inviting memories of family gatherings, picnics in the sun, and simple breakfast moments. This homemade sourdough sandwich bread brings all that and more, filling your heart—and your stomach—with joy.
This isn’t just bread; it’s your new favorite staple, with a crusty exterior that breaks beautifully to reveal a tender and chewy texture inside. The tanginess of the sourdough starter plays in harmony with the slightly sweet notes from the sugar, giving each slice a delightful character. Picture slathering a slice with creamy butter, watching it melt beneath your fingertips, or crafting the ultimate sandwich with layers of roasted turkey, crisp lettuce, and a luscious spread. Whatever you choose, this bread elevates every dish, making mundane meals extraordinary.
As the sun sets and you share the warm bread with family or friends, conversations flow easily, laughter fills the air, and each bite becomes a shared moment of happiness. You’ll cherish the comfort this sourdough sandwich bread provides, not only filling your belly but also creating a sense of togetherness and nostalgia. Ready to create your very own batch of happiness? Let’s dive into the wonders of sourdough!
Why You’ll Love This Softest Homemade Sourdough Sandwich Bread
Imagine having the kind of bread that perfectly complements every meal or snack you could dream of. The softest homemade sourdough sandwich bread boasts more than just delicious taste; it provides a burst of joy in every bite. The unique interplay of the sourdough starter adds depth, making it ideal for everything from morning toast to lunchtime sandwiches. This bread rises to the occasion, quite literally, providing a pillowy base for hearty sandwiches or breakfast toast without compromising structure.
Crafted with love, this bread doesn’t just elevate your meals; it enhances your culinary experiences. With a crust that offers a satisfying crunch and a tender inside that is chewy yet melt-in-your-mouth soft, it’s perfect for gatherings, cozy breakfasts, or even a simple afternoon snack. Whether you serve it at a family gathering or savor it solo, this bread envelops you in warmth, reminding you that simple pleasures yield the greatest happiness.
Preparation Phase & Tools to Use
To embark on your sourdough baking journey, gather a few essential tools that will make your experience enjoyable and successful. Here’s what you need:
-
Large Mixing Bowl: Essential for combining your ingredients; it gives you room to work and allows the dough to develop properly as it rises.
-
Dough Scraper: This handy tool helps you move and shape your dough without fuss. It’s especially helpful for kneading and transferring dough to and from surfaces.
-
Loaf Pan: A good-quality loaf pan helps your bread maintain its shape. For a hearty texture and consistent baking, opt for a metal or glass pan.
-
Damp Cloth: Use this to cover your dough while it rises. It helps retain moisture to ensure a soft and tender loaf.
-
Oven: This is your ultimate tool for baking! Preheating ensures even cooking, leading to that perfect, golden-brown crust.
-
Cooling Rack: After pulling your bread from the oven, it’s vital to let it cool. A cooling rack allows air to circulate around the loaf, preventing sogginess.
Preparation Tips:
- Always use a digital kitchen scale when measuring flour. Achieving the correct hydration is critical for that beautifully soft texture.
- Keep the kitchen warm and draft-free while your dough rises to encourage better fermentation.
Ingredients for Softest Homemade Sourdough Sandwich Bread
Gather these simple yet crucial ingredients to begin your baking adventure:
-
3 cups all-purpose flour: This provides the structure for your bread. You can substitute whole wheat flour for a nuttier flavor or gluten-free flour mix if needed, though it may alter the texture.
-
1 cup active sourdough starter: This not only adds flavor but aids in the fermentation process. Ensure your starter is bubbly and fed for the best results.
-
1 cup warm water: This hydrates your flour. It’s ideal to use water that is around 100°F (38°C) to activate the yeast in your starter without hindering it.
-
1 teaspoon salt: Enhances flavor and strengthens the dough—never skip this step!
-
1 tablespoon sugar: This serves as food for the yeast, ensuring a lively rise while adding a touch of sweetness.
-
1 tablespoon olive oil: This adds richness and contributes to the tenderness of the bread.
How to Make Softest Homemade Sourdough Sandwich Bread
Creating this soft and flavorful sourdough bread consists of a few delightful steps:
-
Combine Ingredients: In a large mixing bowl, mix the active sourdough starter, warm water, sugar, and olive oil until fully combined. This activates the yeast and sets the foundation for your dough.
-
Add Flour and Salt: Gradually sprinkle in the flour and add salt, mixing gently with a wooden spoon or dough scraper until a shaggy dough forms.
-
Knead the Dough: Dust a clean surface with flour. Turn the dough out and knead it for about 10 minutes. You want a smooth, elastic consistency that springs back when pressed.
-
First Rise: Shape the dough into a ball and place it in a greased bowl. Cover it with a damp cloth and let it rise in a warm spot for 4-6 hours or until it has doubled in size. You can check readiness by gently poking—if it springs back slowly, it’s ready.
-
Reshape the Dough: Once risen, gently punch down the dough to release excess air. Shape it back into a loaf and place it in a greased loaf pan. Cover again and let it rise for another 1-2 hours until puffed.
-
Preheat the Oven: Preheat the oven to 375°F (190°C). This ensures your bread starts baking as soon as it hits the heat.
-
Bake: Slide the loaf into the oven and bake it for 30-35 minutes, or until it turns golden brown and sounds hollow when tapped on the bottom.
-
Cool Before Slicing: Remove the bread from the oven and let it cool completely on a rack. Patience here ensures neat slicing.
Chef’s Notes & Helpful Tips
-
Make-Ahead Tips: If time is tight, prepare the dough the night before and refrigerate it after the first rise. Shape it in the morning and continue as directed.
-
Cooking Alternatives: You can experiment with an air fryer for smaller loaves. Adjust the time to about 20-25 minutes and keep an eye on the color.
-
Customization Ideas: Add herbs, cheese, or seeds to enrich flavor. Or turn it into a sweet version by including raisins or cinnamon.
Common Mistakes to Avoid
-
A Cold Environment: Make sure your dough rises in a warm, draft-free place. Cold air inhibits fermentation, leading to a dense loaf.
-
Under or Over-Kneading: Knead just enough to develop gluten. Over-kneading leads to a tough texture, while under-kneading results in bread that fails to rise.
-
Not Using Active Starter: Ensure your sourdough starter is bubbly and at its peak before using. An inactive starter leads to disappointing dough.
-
Skipping Cooling Time: Cutting into the bread too soon can lead to gummy slices. Always wait for cooling to achieve the perfect texture.
What to Serve With Softest Homemade Sourdough Sandwich Bread
The possibilities are endless with this versatile bread! Here are a few pairing ideas to tantalize your taste buds:
-
Classic Peanut Butter and Jelly: The creamy richness of the peanut butter combined with the sweetness of the jelly creates a nostalgic snack.
-
Avocado Toast: Mash a ripe avocado with lemon juice, salt, and pepper, then pile generously onto a slice of toasted bread for a fresh breakfast.
-
Turkey and Swiss Sandwich: Pile thinly sliced turkey with Swiss cheese and crisp lettuce, bringing together texture and flavor.
-
Caprese Sandwich: Layer fresh mozzarella, ripe tomatoes, and basil drizzled with balsamic glaze for a refreshing lunch option.
-
French Toast: Dip slices of the bread in an egg mixture and grill for a decadent breakfast option, serving with syrup and fruit.
-
Grilled Cheese: Melt your favorite cheese between two slices for a warm, gooey treat that complements the tang of the sourdough.
-
Soup Companion: Serve alongside your favorite soup for a comforting meal during chilly nights.
-
Homemade Bruschetta: Top with diced tomatoes, garlic,olive oil, and basil for an easy appetizer that makes each bite sing.
Storage & Reheating Instructions
To enjoy your homemade sourdough at its finest, proper storage is key. Once cooled, wrap the bread in a clean kitchen towel and then place it in a bread bag. This helps maintain moisture while preventing the crust from becoming overly soft.
-
Room Temperature: Enjoy your bread within three days.
-
Freezing: If you wish to store it longer, slice the bread and place it in a freezer-safe bag. It will stay fresh for up to three months. Simply toast slices directly from the freezer or let them sit at room temperature to thaw.
Estimated Nutrition Information
Approximate values per slice (based on 12 slices):
- Calories: 120
- Protein: 4g
- Carbohydrates: 22g
- Fat: 2g
- Fiber: 1g
- Sugar: 0.5g
Note: Nutritional content may vary based on specific ingredients and portion sizes.
FAQs
1. Can I use whole wheat flour instead of all-purpose flour?
Yes, substituting whole wheat flour will yield a denser loaf. For best results, use a blend of both flours.
2. How can I tell if my sourdough starter is active enough?
Your starter should be bubbly, doubled in volume, and have a pleasant, slightly tangy smell—test it by dropping a spoonful into water; if it floats, it’s ready.
3. What if my bread isn’t rising?
This can be due to a weak starter or a cold environment. Ensure your starter is fresh and warm the area where your dough rises.
4. Can I add add-ins like nuts or dried fruits?
Absolutely! Stir in your favorite add-ins during the kneading phase to customize your bread to your taste.
5. How do I know when my bread is done baking?
A hollow sound when tapped on the bottom and a golden-brown crust indicates your bread is fully baked.
Conclusion
Baking the softest homemade sourdough sandwich bread not only fills your kitchen with the alluring smells of baking but also wraps your heart in cozy memories and culinary delights. With a simple list of ingredients and straightforward steps, you create a masterpiece that transforms any meal. Whether you enjoy it fresh out of the oven, as part of a delightful sandwich, or slathered in butter, each experience becomes a cherished moment. So, roll up your sleeves and embrace the art of sourdough baking. Your taste buds—and your loved ones—will thank you!
Print
Softest Homemade Sourdough Sandwich Bread
- Prep Time: 15 minutes
- Cook Time: 35 minutes
- Total Time: 50 minutes
- Yield: 12 servings 1x
- Category: Bread
- Method: Baking
- Cuisine: American
- Diet: Vegetarian
Description
Discover the magic of baking with this sourdough sandwich bread that offers a crusty exterior and a soft, pillowy interior, perfect for any meal.
Ingredients
- 3 cups all-purpose flour
- 1 cup active sourdough starter
- 1 cup warm water
- 1 teaspoon salt
- 1 tablespoon sugar
- 1 tablespoon olive oil
Instructions
- Combine ingredients: In a large mixing bowl, mix the active sourdough starter, warm water, sugar, and olive oil until fully combined.
- Add flour and salt: Gradually sprinkle in the flour and add salt, mixing gently until a shaggy dough forms.
- Knead the dough: Dust a clean surface with flour. Turn the dough out and knead it for about 10 minutes.
- Shape the dough into a ball and place it in a greased bowl. Cover it with a damp cloth and let it rise in a warm spot for 4-6 hours.
- Reshape the dough: Once risen, punch down the dough, shape it back into a loaf, and place it in a greased loaf pan.
- Preheat the oven to 375°F (190°C).
- Bake: Slide the loaf into the oven and bake for 30-35 minutes, or until golden brown.
- Cool completely on a rack before slicing.
Notes
For enhanced flavor, consider adding herbs, cheese, or seeds. Always use a digital kitchen scale for accurate measurements.
Nutrition
- Serving Size: 1 slice
- Calories: 120
- Sugar: 0.5g
- Sodium: 400mg
- Fat: 2g
- Saturated Fat: 0g
- Unsaturated Fat: 1g
- Trans Fat: 0g
- Carbohydrates: 22g
- Fiber: 1g
- Protein: 4g
- Cholesterol: 0mg