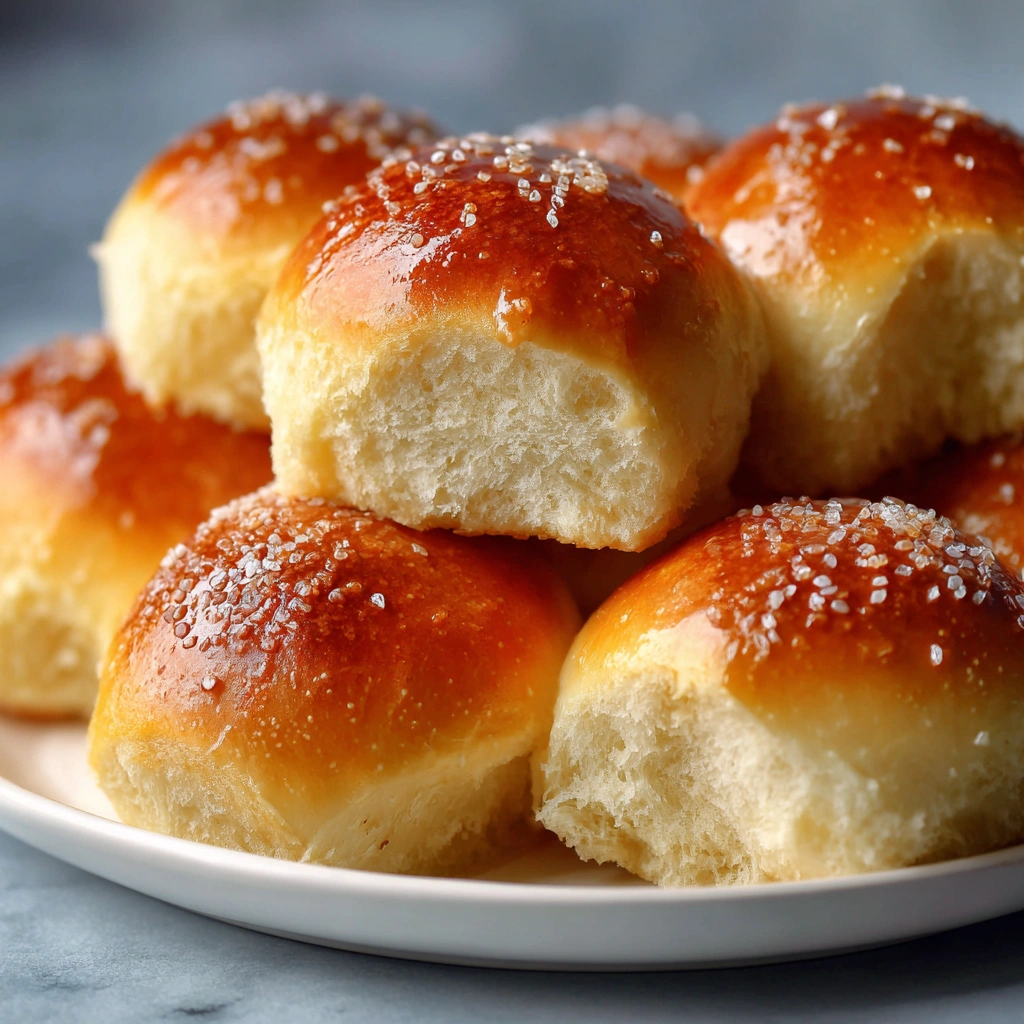
Introduction to Homemade Dinner Rolls
There’s something magical about the aroma of freshly baked bread wafting through the house. Homemade dinner rolls are not just a side dish; they’re a warm hug on a plate. Whether you’re hosting a family gathering or just looking for a quick solution for a busy weeknight dinner, these fluffy rolls are perfect. They’re easy to make, and trust me, your loved ones will be impressed. Plus, who can resist the joy of pulling apart a soft, buttery roll? Let’s dive into this delightful recipe that will surely become a staple in your kitchen!
Why You’ll Love This Homemade Dinner Rolls
These homemade dinner rolls are a game-changer for busy moms and professionals alike. They’re quick to whip up, taking just over an hour from start to finish. The taste? Absolutely divine! Fluffy, buttery, and warm, they elevate any meal. Plus, they’re versatile enough to pair with everything from soups to holiday feasts. You’ll love how they bring everyone together around the table, creating moments that matter.
Ingredients for Homemade Dinner Rolls
Gathering the right ingredients is the first step to creating these delightful homemade dinner rolls. Here’s what you’ll need:
- All-purpose flour: This is the backbone of your rolls, providing structure and fluffiness. You can substitute with whole wheat flour for a heartier texture.
- Active dry yeast: This little powerhouse helps your rolls rise. Make sure it’s fresh for the best results. If you have instant yeast, you can use that too!
- Sugar: A touch of sweetness enhances the flavor and helps activate the yeast. You can use honey or maple syrup as a natural alternative.
- Salt: Essential for flavor, it also strengthens the dough. Don’t skip this step; it makes a difference!
- Warm milk: This adds moisture and richness. Whole milk gives a creamier taste, but any milk will work. Just ensure it’s warm, not hot, to protect the yeast.
- Unsalted butter: Melted butter adds a lovely richness and flavor. You can replace it with olive oil for a dairy-free option.
- Large eggs: Eggs contribute to the dough’s structure and moisture. If you’re looking for an egg-free version, try using flaxseed meal mixed with water.
For exact measurements, check the bottom of the article where you can find everything listed for easy printing. Happy baking!
How to Make Homemade Dinner Rolls
Now that you have your ingredients ready, let’s get to the fun part—making these delightful homemade dinner rolls! Follow these simple steps, and you’ll have fluffy rolls that will make your kitchen smell heavenly.
Step 1: Prepare the Yeast Mixture
Start by combining warm milk, sugar, and active dry yeast in a large bowl. The milk should feel warm to the touch, around 110°F. Stir gently and let it sit for about 5-10 minutes. You’ll know it’s ready when the mixture becomes frothy and bubbly. This means your yeast is alive and kicking, ready to work its magic!
Step 2: Mix in Butter and Eggs
Once your yeast mixture is frothy, it’s time to add the melted butter and eggs. Pour them in and mix well until everything is combined. The warmth of the mixture will help the butter blend smoothly. This step adds richness and flavor to your rolls, making them irresistible!
Step 3: Form the Dough
Now, gradually add the all-purpose flour and salt to the wet mixture. I like to do this in batches, mixing until a dough starts to form. You want a soft, slightly sticky dough that pulls away from the sides of the bowl. If it feels too sticky, don’t hesitate to add a little more flour, but be careful not to overdo it!
Step 4: Knead the Dough
Time to get your hands a little messy! Transfer the dough to a floured surface and knead it for about 5-7 minutes. You’re looking for a smooth and elastic texture. Kneading is like giving your dough a workout, helping to develop the gluten that makes your rolls fluffy. If the dough sticks to your hands, sprinkle a bit of flour as needed.
Step 5: Let the Dough Rise
Once kneaded, place the dough in a greased bowl, turning it to coat all sides. Cover it with a clean kitchen towel or plastic wrap. Now, let it rise in a warm place for about 1 hour, or until it doubles in size. This is the perfect time to tidy up your kitchen or sip on a cup of tea!
Step 6: Shape the Rolls
After the dough has risen, it’s time to punch it down gently to release the air. Divide the dough into 12 equal pieces. Roll each piece into a ball, tucking the edges underneath to create a smooth top. Place the shaped rolls in a greased baking dish, leaving a little space between them for expansion.
Step 7: Second Rise
Cover the rolls again and let them rise for another 30 minutes. This second rise is crucial for achieving that light and fluffy texture. While you wait, you can preheat your oven to 375°F (190°C). The anticipation will make the final result even more rewarding!
Step 8: Bake the Rolls
Once the rolls have puffed up beautifully, it’s time to bake! Place them in the preheated oven and bake for 15-20 minutes, or until they’re golden brown on top. Keep an eye on them; the smell will be tempting! When they’re done, brush the tops with melted butter for that extra touch of goodness.
Tips for Success
- Always check the expiration date on your yeast for the best rise.
- Use a kitchen thermometer to ensure your milk is at the right temperature.
- Don’t rush the rising time; it’s key for fluffy rolls.
- For a golden crust, brush the rolls with butter right after baking.
- Experiment with adding herbs or garlic for a flavor twist!
Equipment Needed
- Large mixing bowl: A sturdy bowl for combining ingredients. A glass or stainless steel bowl works well.
- Measuring cups and spoons: Essential for accuracy. If you don’t have these, use a kitchen scale.
- Floured surface: A clean countertop or cutting board for kneading. A silicone mat is a great alternative.
- Baking dish: A 9×13 inch dish is perfect. You can also use a round cake pan.
- Kitchen towel or plastic wrap: To cover the dough while it rises. A clean shower cap can work too!
Variations of Homemade Dinner Rolls
- Herb-Infused Rolls: Add dried herbs like rosemary or thyme to the dough for a fragrant twist.
- Garlic Butter Rolls: Mix minced garlic into the melted butter before brushing it on top for a savory flavor.
- Whole Wheat Rolls: Substitute half of the all-purpose flour with whole wheat flour for a nuttier taste and added fiber.
- Cheesy Rolls: Fold in shredded cheese, like cheddar or mozzarella, into the dough for a cheesy delight.
- Sweet Rolls: Add cinnamon and sugar to the dough for a sweet version, perfect for breakfast or dessert.
- Gluten-Free Rolls: Use a gluten-free flour blend to make these rolls suitable for those with gluten sensitivities.
Serving Suggestions for Homemade Dinner Rolls
- Pair these rolls with a warm bowl of soup, like creamy tomato or hearty chicken noodle.
- Serve alongside a fresh garden salad drizzled with vinaigrette for a light meal.
- For a festive touch, present them in a beautiful bread basket lined with a cloth napkin.
- Enjoy with a spread of flavored butter or homemade jam for a delightful twist.
- Complement with a glass of chilled white wine or sparkling water for a refreshing drink.
FAQs about Homemade Dinner Rolls
Can I make these homemade dinner rolls ahead of time?
Absolutely! You can prepare the dough and let it rise, then shape the rolls and refrigerate them overnight. Just let them come to room temperature before baking. This is a great time-saver for busy days!
What if my rolls don’t rise?
If your rolls don’t rise, it could be due to inactive yeast. Always check the expiration date on your yeast packet. Also, ensure your milk is warm, not hot, as high temperatures can kill the yeast.
Can I freeze homemade dinner rolls?
Yes! These rolls freeze beautifully. After baking, let them cool completely, then wrap them tightly in plastic wrap and place them in a freezer bag. Reheat them in the oven when you’re ready to enjoy!
How do I store leftover rolls?
Store any leftover rolls in an airtight container at room temperature for up to three days. If you want to keep them longer, consider freezing them as mentioned earlier.
Can I add flavors to my dinner rolls?
Definitely! Feel free to experiment with herbs, garlic, or even cheese. Adding these ingredients can elevate your homemade dinner rolls to a whole new level of deliciousness!
Final Thoughts
Making homemade dinner rolls is more than just baking; it’s about creating memories and sharing love through food. The joy of pulling those golden, fluffy rolls from the oven is unmatched. Each bite is a reminder of the warmth of home and the comfort of family gatherings. Whether you’re serving them at a holiday feast or a simple weeknight dinner, these rolls will surely bring smiles to your loved ones’ faces. So, roll up your sleeves, embrace the process, and enjoy the delightful aroma that fills your kitchen. Happy baking, my friends!
Print
Homemade Dinner Rolls: Discover the Secret Recipe!
- Prep Time: 20 minutes
- Cook Time: 20 minutes
- Total Time: 1 hour 40 minutes
- Yield: 12 rolls 1x
- Category: Breads
- Method: Baking
- Cuisine: American
- Diet: Vegetarian
Description
Delicious and fluffy homemade dinner rolls that are perfect for any meal.
Ingredients
- 4 cups all-purpose flour
- 1 packet (2 1/4 tsp) active dry yeast
- 1/4 cup sugar
- 1 teaspoon salt
- 1 cup warm milk (110°F)
- 1/4 cup unsalted butter, melted
- 2 large eggs
Instructions
- In a large bowl, combine warm milk, sugar, and yeast. Let it sit for 5-10 minutes until frothy.
- Add melted butter and eggs to the yeast mixture and mix well.
- Gradually add flour and salt, mixing until a dough forms.
- Knead the dough on a floured surface for about 5-7 minutes until smooth.
- Place the dough in a greased bowl, cover, and let it rise in a warm place for 1 hour or until doubled in size.
- Punch down the dough and divide it into 12 equal pieces.
- Shape each piece into a ball and place them in a greased baking dish.
- Cover and let them rise for another 30 minutes.
- Bake in a preheated oven at 375°F (190°C) for 15-20 minutes or until golden brown.
- Brush with melted butter before serving.
Notes
- For a richer flavor, use whole milk instead of warm milk.
- These rolls can be frozen after baking; just reheat before serving.
- Feel free to add herbs or garlic for extra flavor.
Nutrition
- Serving Size: 1 roll
- Calories: 150
- Sugar: 2g
- Sodium: 150mg
- Fat: 5g
- Saturated Fat: 3g
- Unsaturated Fat: 2g
- Trans Fat: 0g
- Carbohydrates: 22g
- Fiber: 1g
- Protein: 4g
- Cholesterol: 30mg